
Whiteboard etiquette for browser-based tools means designing your board around the task, assigning clear roles and permissions, narrating changes as you make them, building in accessibility from the start, and tidying up before you close the session. These five habits turn a blank digital canvas into a workspace that remote teams, teachers, and tutors can actually trust. Skip them, and even the best whiteboard app becomes a cluttered guessing game.
TL;DR:
- Clear zoning and ownership with labels improve board clarity and prevent visual noise during collaborative sessions.
- Facilitators should script and narrate their actions explicitly, using short prompts and summaries to maintain focus.
- Participants must respect shared space by marking contributions and avoiding overwriting, ensuring trust and usability.
- Building accessibility through narration, labeling, and alternative input methods is essential for inclusive collaboration.
- Proper setup, role assignment, and cleanup procedures are crucial for maintaining an effective, secure, and organized whiteboard workspace.
Table of Contents
- 1. Design the Board Around the Task
- 2. Facilitators Should Script the Session, Not Just Open the Canvas
- 3. Participants Keep the Shared Space Usable
- 4. Build Accessibility Into Every Session From the Start
- 5. Set Up Boards and Permissions Before Anyone Joins
- 6. Run the Session With a Before, During, and After Checklist
- 7. Clean Up and Hand Off the Board Properly
- 8. Use Markers and Shapes With Intention
- 9. Keep Confidential Information Off Shared Boards
- 10. Position Yourself Comfortably for Longer Whiteboard Sessions
- 11. Prevent Clutter That Behaves Like Smudging or Ghosting
- 12. How OnlineWhiteboard.co Fits Into This Etiquette
- Try a Whiteboard Built for These Habits
- FAQ
- Sources
1. Design the Board Around the Task
A whiteboard only works as a shared thinking space when everyone can see the same structure in it. Digital whiteboard guidance from NC State recommends organizing boards by activity, using sections, frames, concept maps, flow charts, or cards so participants know where to add content and what happens next. A brainstorming zone should look nothing like a decision log or a backlog, even if they sit on the same canvas.
Ownership matters just as much as layout. When cursors, initials, or color tags show who added what, teams build a shared mental model faster, a point echoed in research on team cognition and online whiteboards. Keeping related content clustered, and limiting how many people edit the same zone at once, prevents the visual noise that makes boards unreadable days later.
A few habits make this concrete:
- Create labeled frames or zones for each activity type, such as brainstorm, decision, or backlog.
- Mark ownership with initials, name tags, or visible cursors rather than leaving edits anonymous.
- Keep related notes physically grouped and avoid scattering related ideas across the canvas.
- Preload a starter template so new participants see where their contribution belongs.
Our guide to online whiteboard tools for teams covers how different teams structure shared boards for recurring workflows.
2. Facilitators Should Script the Session, Not Just Open the Canvas
Good facilitation starts before anyone draws a single shape. State the objective, set a time limit for each task, and define what success looks like at the very top of the board. Vague prompts produce vague boards.
Facilitation research presented at ACM CHI 2023 recommends treating the whiteboard as a documentation space separate from the live conversation, cycling through short, repeatable prompts instead of narrating and talking at the same time. A workable rhythm follows three steps:
- Orient the group to the current task and where it lives on the board.
- Add content through short, timed bursts of individual or small-group work.
- Summarize what landed on the board before moving to the next zone.
Narrate major edits out loud as you make them, and pause briefly so slower typers or thinkers can catch up. Use direct turn-taking prompts, calling on someone by name or opening the floor explicitly, rather than relying on intrusive real-time participation scoring, which a 2026 study of 81 university students found can reduce idea fluency and dampen originality.
Pro Tip: Say “I’m adding a card under Decisions” out loud before you drop it on the canvas. It costs two seconds and saves confused follow-up questions later.
Our digital classroom brainstorm activities guide walks through ready-made prompts that fit this structure.
3. Participants Keep the Shared Space Usable
Facilitators set the structure, but participants decide whether it holds up. The simplest rule: mark your own contributions and never overwrite someone else’s note without asking first, even if you think you are improving it.
- Add your name, initials, or a sticky color before placing a note so others know who to ask about it.
- Follow the templates and visual vocabulary already on the board instead of inventing a new system mid-session.
- Use the comment or chat panel for questions and clarifications rather than annotating directly over someone else’s work.
- Signal when you are stepping away or pausing, even with a quick note, so the facilitator and group aren’t left wondering.
These habits take seconds and prevent the slow erosion of trust that happens when people feel their work gets silently edited or buried. Our practical guide to drawing on a whiteboard online covers the mechanics of annotating cleanly without disrupting a shared canvas.
4. Build Accessibility Into Every Session From the Start
A visually impressive board can still exclude half the room. Guidance on using whiteboards accessibly stresses that inclusive practice goes beyond simply turning on an accessibility setting: facilitators need to narrate visual changes out loud, give every object a meaningful text label, and offer more than one way to contribute.
- Narrate what you add or change, and label shapes and sticky notes with plain text, not just color or position.
- Offer a chat box, structured text field, or simple form for anyone who cannot or prefers not to draw on the canvas directly.
- Build in extra time for interaction, and provide a transcript or captions when narration happens out loud.
- Favor object-based elements like SVG shapes over flattened images, and test that keyboard and screen-reader navigation actually works.
A visual-only board is not an inclusive one. Accessibility guidance notes that assistive technology cannot reliably interpret the order or meaning of a fast-changing, unstructured canvas, which is exactly why narration and alternative input channels matter more than they might seem to.
5. Set Up Boards and Permissions Before Anyone Joins
A predictable workspace starts before the first participant logs in. Treat setup as a short checklist, not an afterthought.
- Name the board clearly and add a one-line purpose statement at the top, so latecomers orient instantly.
- Preload a template with short instructions directly on the canvas rather than explaining verbally each time.
- Set edit, comment, and view roles deliberately, and tell participants what each role allows.
- Turn on version history so anyone can revert a mistake or export a snapshot without panic.
This structure matters most for recurring sessions like tutoring or weekly stand-ups, where participants expect the same layout every time. Our virtual tutoring session checklist breaks this down further for teachers running one-on-one or small-group lessons.
6. Run the Session With a Before, During, and After Checklist
Facilitation gets easier when it follows the same three-phase rhythm every time.
- Before: confirm the objective, check that access and permissions are correct, run a quick accessibility pass, and load the template.
- During: orient the group, narrate changes as you make them, summarize progress at natural breakpoints, manage turn-taking explicitly, and invite quieter participants by name.
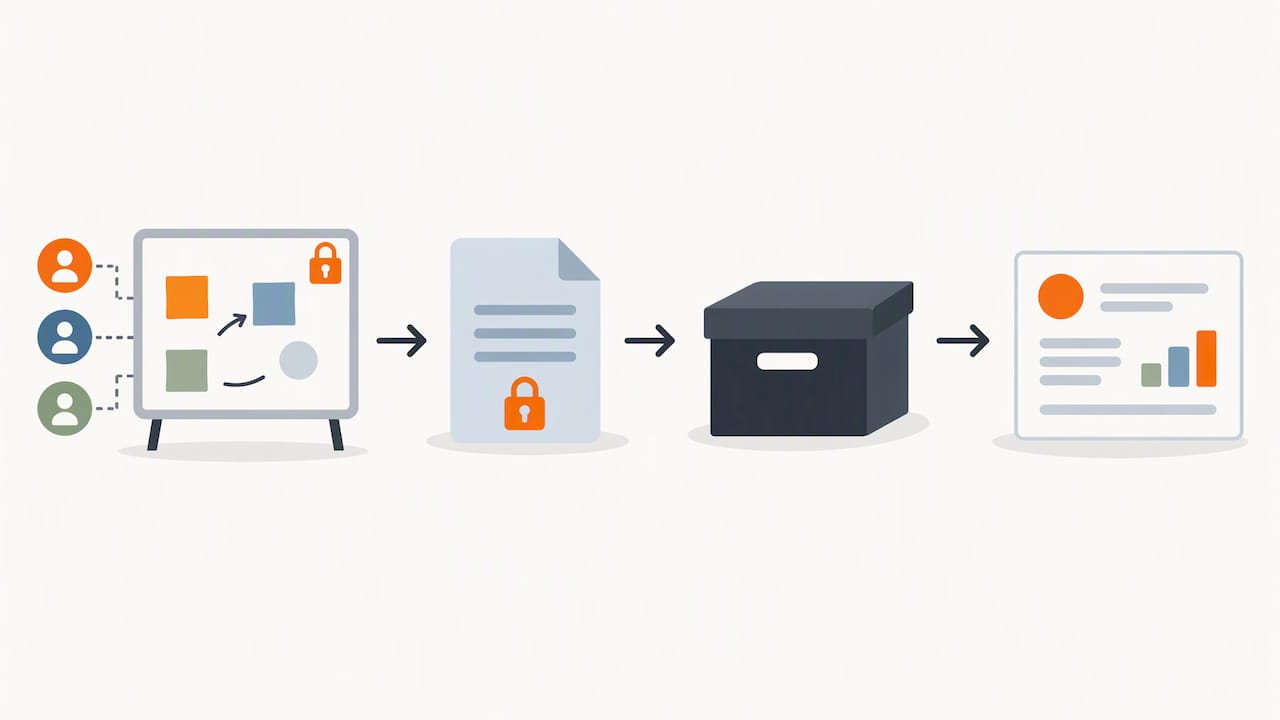
- After: export a snapshot or PDF, label outcomes and their owners clearly, and archive a trimmed version of the board rather than the full working mess.
Treat this as a repeatable script rather than a one-time setup. The same three phases apply whether you are running a ten-minute stand-up or a ninety-minute workshop.
7. Clean Up and Hand Off the Board Properly
Before closing a session, agree on what counts as a permanent record versus a transient scratchpad. Not every sticky note deserves to survive.
- Decide together which notes are archival and which are just working clutter before anyone starts deleting.
- Export a PDF or image snapshot for any decision that needs a record, and tag the owner directly on it.
- Link the exported snapshot to your project docs or LMS with a short, one-line summary of what was decided.
A trimmed export that keeps only final decisions, stripped of intermediate noise, is far more useful six months later than a full, unedited canvas.
8. Use Markers and Shapes With Intention
Digital markers behave differently from physical ones, and sloppy habits translate just as badly online. Pick one or two pen weights for the whole session, a thin one for notes and a thicker one for headers or emphasis, rather than switching styles note by note. Consistency here does more for readability than color variety ever will.
Reserve bright or warning colors, like red, for flagged items or blockers, so they carry meaning instead of just decoration. Overusing color turns every note into a visual alarm, and the real alarms get lost.
The eraser deserves the same discipline as the marker. Erase individual elements rather than wiping entire zones, and confirm with the group before clearing anything that might still be in use. Most online whiteboards support undo and version history, so when in doubt, revert rather than delete outright. Clean up stray marks and unused shapes at natural breakpoints rather than letting them pile up until the board is unreadable. A board where every shape earns its place is easier to read at a glance than one where every available tool got used just because it was there.
9. Keep Confidential Information Off Shared Boards
Online whiteboards are often more exposed than people assume. A board shared by link can end up viewed, duplicated, or indexed well beyond its original audience, so treat it the way you would any document with open sharing settings.
Avoid placing names tied to sensitive performance feedback, financial figures, health information, or anything else that would cause harm if screenshotted and forwarded. If a session genuinely requires sensitive detail, work on a board with view and edit permissions locked to named participants only, and confirm those permissions before the session starts, not during it.
Set an end-of-life plan for every board that touches sensitive material. Decide in advance whether it gets deleted, archived privately, or stripped down to a sanitized summary before anyone exports it. When in doubt, write the sensitive detail somewhere else entirely, a private document or a secure chat, and keep the whiteboard focused on structure and ideas rather than specifics that need protecting.
10. Position Yourself Comfortably for Longer Whiteboard Sessions
A whiteboard session that runs an hour puts real strain on your eyes, neck, and wrists if your setup is wrong. Keep your screen at eye level, roughly arm’s length away, so you are not hunching forward to read small text or tilting your neck down for an extended stretch.
If you are drawing with a stylus or trackpad rather than a mouse, rest your wrist on a flat surface instead of holding it rigid in the air. That small adjustment matters more over a ninety-minute workshop than it does for a quick five-minute sketch.
Take a short break between long facilitation blocks, even thirty seconds to look away from the screen. Facilitators especially benefit from standing periodically since narrating, typing, and watching the board simultaneously is more taxing than passive viewing. None of this is unique to whiteboards, but sessions that run long enough to need a break are exactly the ones where posture habits get forgotten first.
11. Prevent Clutter That Behaves Like Smudging or Ghosting
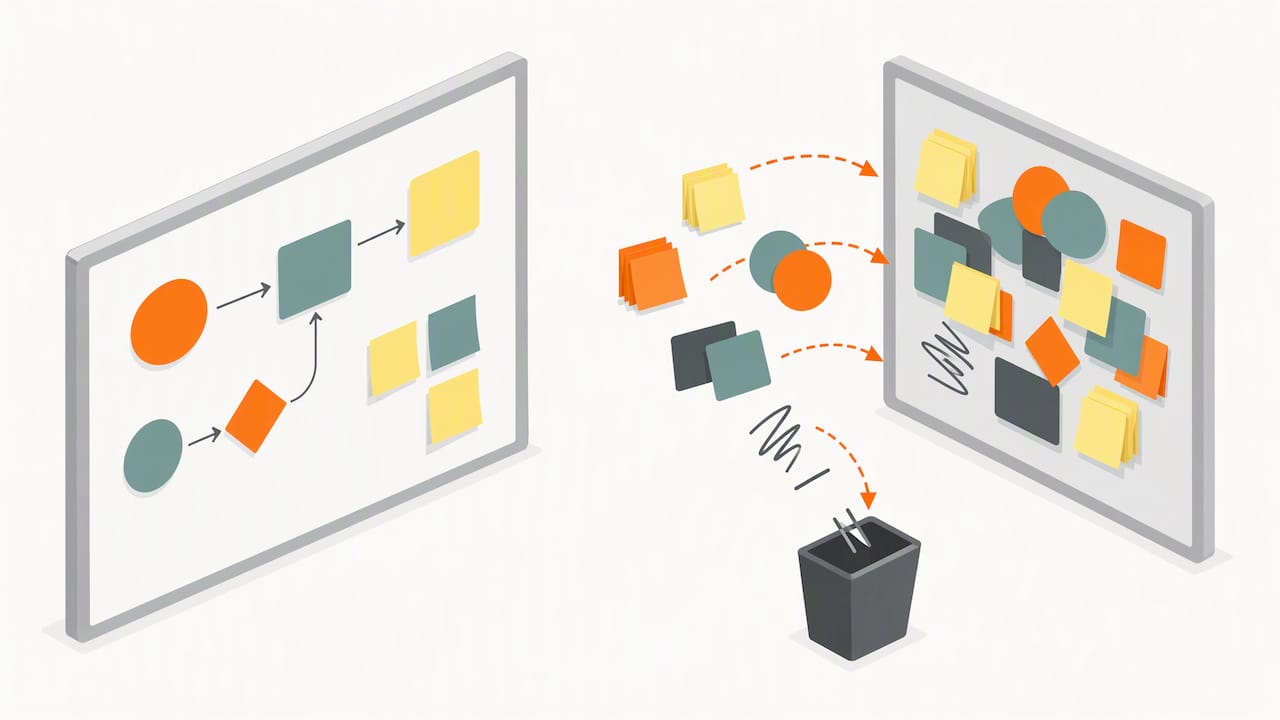
Digital boards do not smudge the way a dry-erase surface does, but they develop an equivalent problem: layers of overlapping notes, duplicate shapes, and abandoned drafts that make the canvas feel smeared and hard to parse. That visual buildup is the real-world version of ghosting, old content bleeding into the current conversation.
Prevent it by deleting duplicate or outdated notes as soon as they are identified, rather than leaving them stacked for later cleanup. Encourage participants to move finished drafts into an archive frame instead of leaving them scattered across the active workspace. Periodically zoom out and scan the whole board for overlapping elements. If several shapes are stacked on top of each other, that is the digital equivalent of a smudged corner, and it is worth a thirty-second cleanup pass before it spreads further.
12. How OnlineWhiteboard.co Fits Into This Etiquette
We built Onlinewhiteboard as a simple, browser-based canvas for teams, teachers, tutors, and students, with no downloads or setup required. Templates, sharing and permission controls, visible cursors, and export options offer practical tools to put this etiquette into practice rather than just read about it. For a closer look at how these features support real sessions, our guide to the best collaborative whiteboard platform goes further.
Try a Whiteboard Built for These Habits
Good etiquette needs a tool that gets out of the way. Onlinewhiteboard opens instantly in your browser, with no installs, so your team or class can start applying these norms today.
FAQ
What is whiteboard etiquette for online tools?
Whiteboard etiquette for browser-based tools covers how teams structure boards, assign roles and permissions, narrate changes, and clean up afterward so the canvas stays useful. It applies to remote meetings, classrooms, and tutoring sessions run on digital whiteboards rather than physical ones.
How do I keep an online whiteboard accessible?
Narrate major changes out loud, label every object with plain text, and offer a chat or text-based way to contribute alongside drawing. Accessibility guidance also recommends testing keyboard and screen-reader navigation before relying on a board in a live session.
Should facilitators track individual participation on a whiteboard?
Avoid visible, real-time participation scoring during brainstorming. A 2026 study found that this kind of intrusive tracking reduced idea fluency, so explicit turn-taking prompts work better for keeping contributions balanced.
How should I handle sensitive information on a shared whiteboard?
Keep confidential details like financial figures or personal feedback off boards shared by open link, and restrict permissions to named participants when sensitive content is unavoidable. Decide in advance whether the board gets archived privately or deleted once the session ends.
What should happen to a whiteboard after a session ends?
Export a snapshot or PDF of the final decisions, label the owners of each outcome, and archive a trimmed version rather than the full working canvas. Research on online interactive whiteboards recommends keeping only the final record and stripping out intermediate clutter.
Sources
- Digital Whiteboards for Teaching and Learning | Teaching Resources
- Cognition-oriented Facilitation and Guidelines for Collaborative Problem-solving Online and Face-to-face | CHI 2023
- Use Zoom whiteboards with accessibility in mind – ASA Newsletter